
Homemade Kaleidoscope
Kaleidoscopes are an incredible tool for witnessing the effects of refracting light, but putting your own kaleidoscope together can be a pain. We’ve simplified the […]
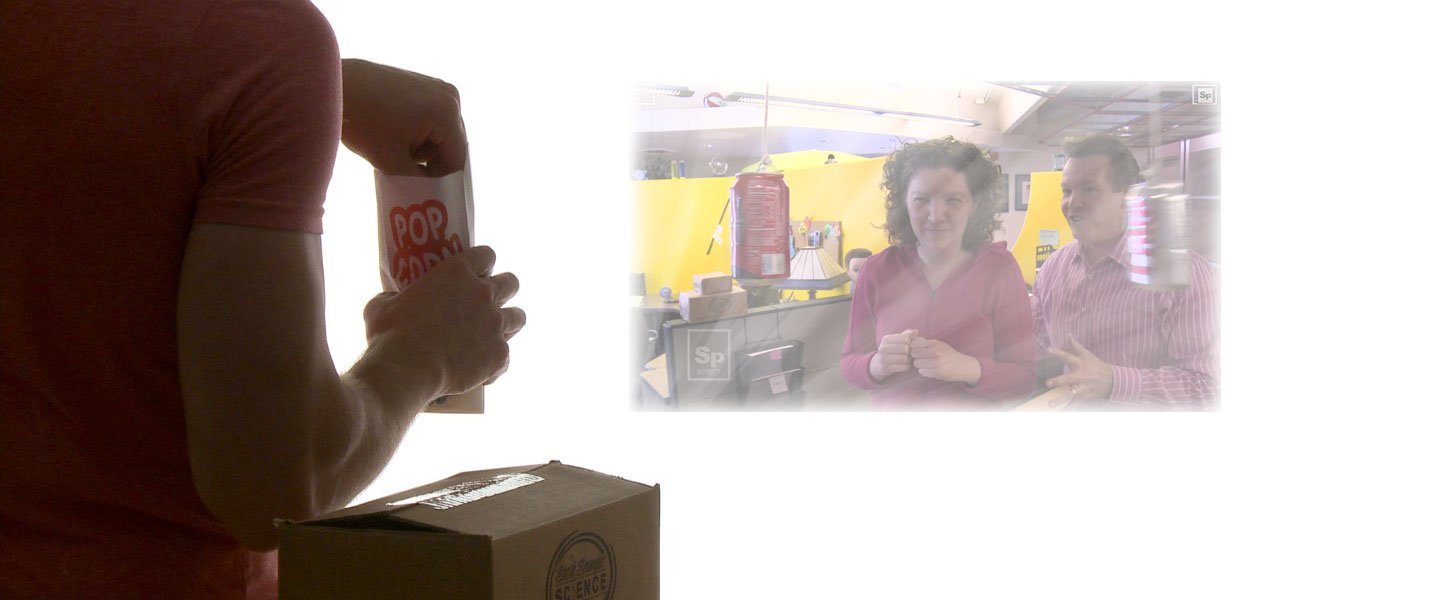
If you’ve watched videos on a smartphone, then you know it can be tough to really enjoy the show on such a small screen. For those who are strapped for cash and/or in the mood to do something creative, make your own projector. All you need is a cardboard box, a smart phone with videos, and a few basic tools. You end up with a real, working projector that you’ve made with your own hands. Spend your money on something else!
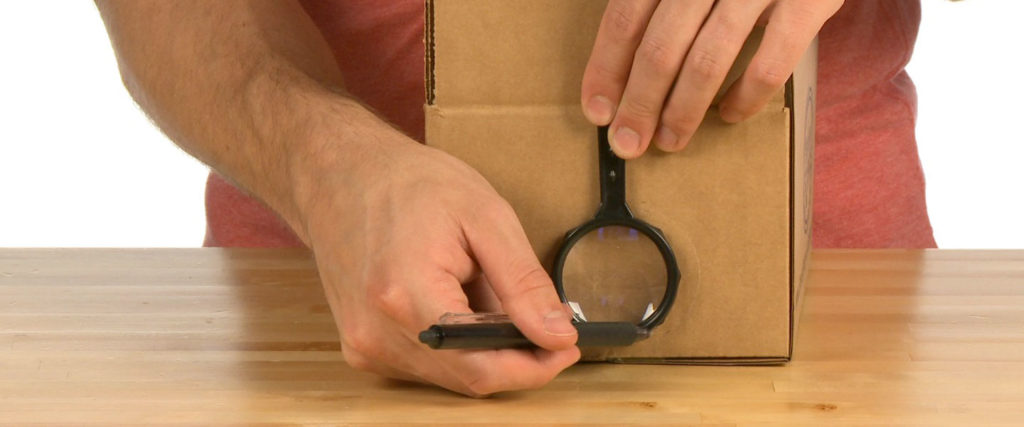
Hold the magnifying glass against one of the “short” sides of the rectangular box. Position it in the center of the side but near the bottom edge. Trace around the lens of the magnifying glass with a pen or marker.
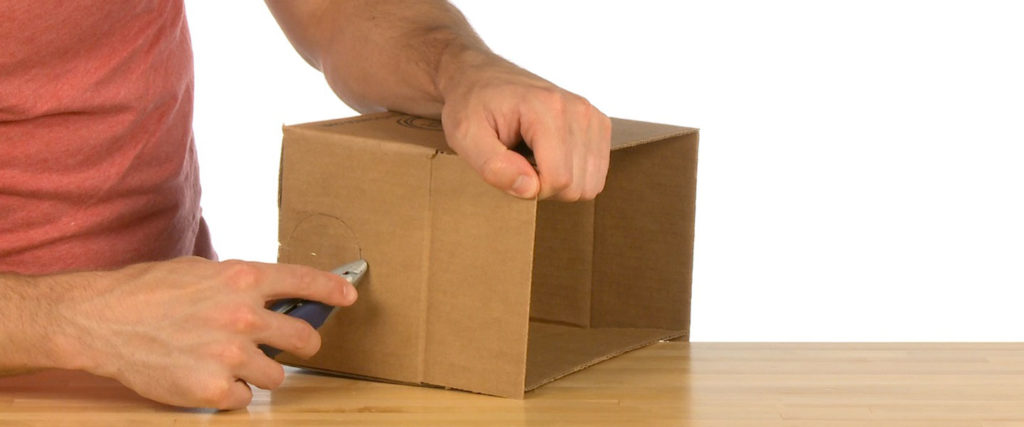
With the utility knife or sharp scissors, cut out the circle you just drew. Keep the edge of the cut as round and smooth as you can.

The phone needs something to lean against inside the box. Cut off the short flap on the top of the box that’s opposite the hole you just made.
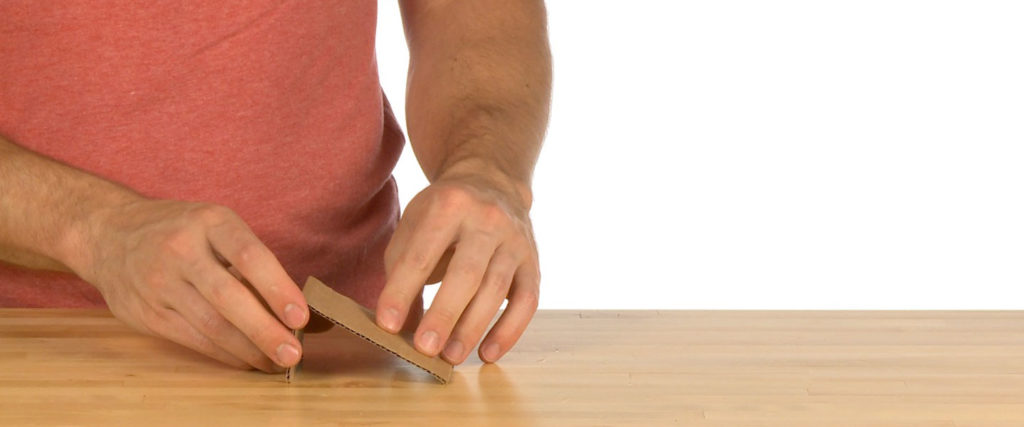
Fold about a third of the flap downward so it looks like a ramp.
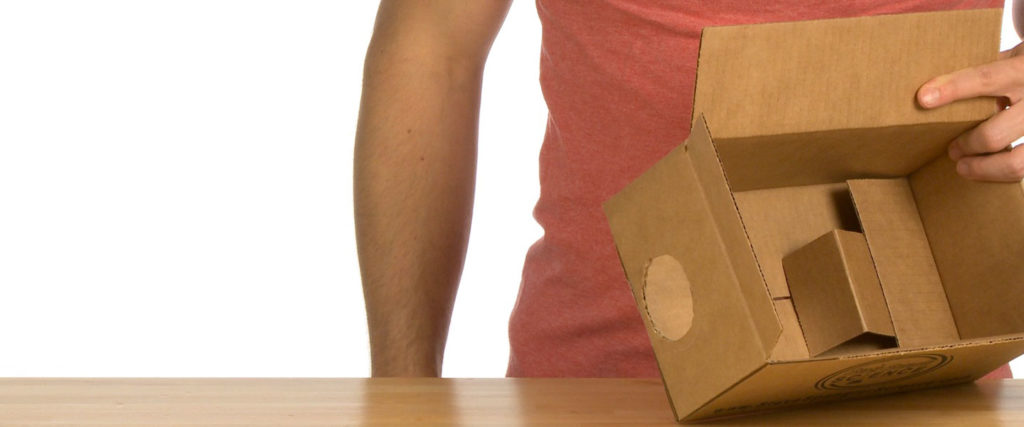
Slide the ramp portion under the short flap on the bottom of the box opposite the hole you cut. It should be a snug fit and the bottom flap should hold the ramp in place. Some tape might be helpful. The vertical piece of the ramp should be directly opposite the hole you cut in about the middle of the box. It helps if it’s as straight up and down as you can get. This is the location for the phone.
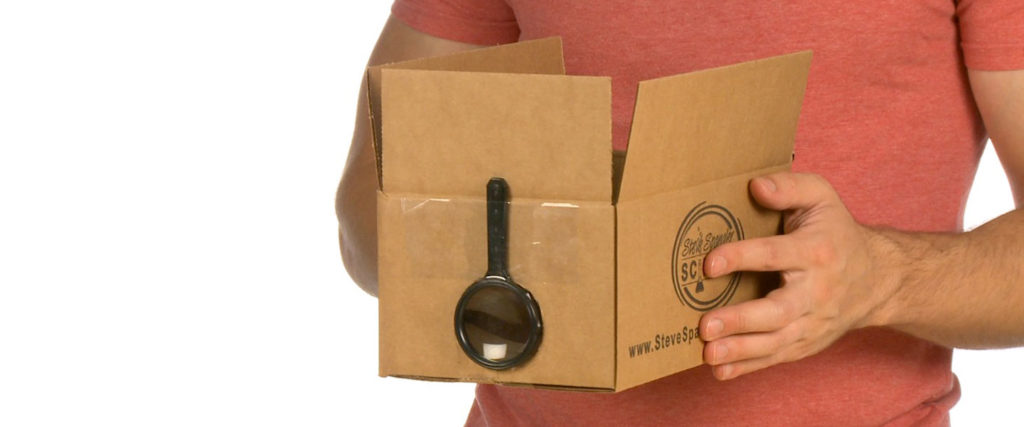
Securely tape the magnifying glass to the outside of the box over the hole you cut. That’s it!
Now for some technical stuff: lock the screen on your phone to a landscape orientation.
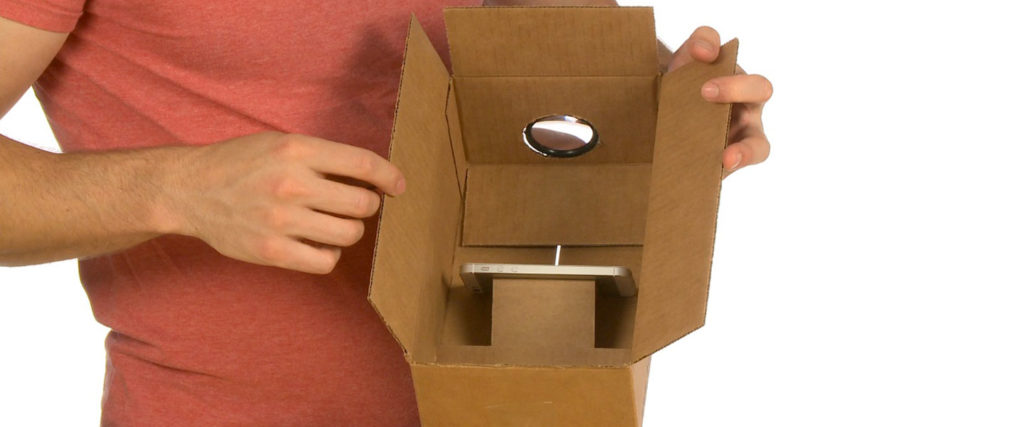
Start playing a long video on the phone. Place it into the projector box so the images are upside down and lean it against the prop you installed. Close the box as tightly as you can with tape or lay a heavy book on top to make it as dark as possible inside the box.

Aim the box at your screen (a white wall), darken the room, grab a snack, and enjoy the show!
Your phone is upside down when you put it into the box and the magnifying glass is a lot smaller than the image on the screen. It just seems a little weird, right? Think about the upside down phone. You probably know that, inside their eyes, humans “see” images of the world upside down. Well, they would be without corrections made by your brain. The Homemade Projector can help visualize this concept. The human eye has a lens in it similar to the magnifying glass that’s attached to your projector. The lens on the box flips images right side up as they pass through it going from the upside down phone to the screen. Your eye flips images coming from what you see so they’re upside down. While your brain flips the image to its correct orientation, the wall doesn’t. That’s why you have to set your phone in the box upside-down. You have to out-think your thinker.
But, how about that image on the screen? It’s way bigger than the lens in the magnifying glass! This works because of the shape of the lens and the fact that light travels in straight lines. A convex lens has a shape where the middle is thicker than the edges, rather than a concave lens which is thinner in the middle than at the edges. The shape of a convex lens allows it to catch, bend, and focus more light coming from the phone inside the box.
Once you have a dark enough space by darkening the “theater,” the magnifying glass will gather, focus, and project the light coming from the phone to the screen and you see images. Thanks to your Homemade Projector!
Kaleidoscopes are an incredible tool for witnessing the effects of refracting light, but putting your own kaleidoscope together can be a pain. We’ve simplified the […]

At first, your eyes are working just fine and the image your brain produces for you is correct even though you may wonder a little […]
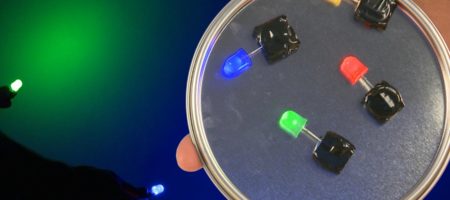
Graffiti Research Lab first introduced us to the awesome throwie idea, and we loved it. Ever since, we’ve been playing around with the idea of […]

Just give the plastic light stick a little “snap” and a shake and the liquid inside begins to glow. Some people call it liquid light. […]
Writing in the dark is challenging. After a letter or two, it gets messy and the message is lost. Even something as simple as your name […]
We heard that it’s possible to actually make a light bulb light-up without any electricity. We figured it out.