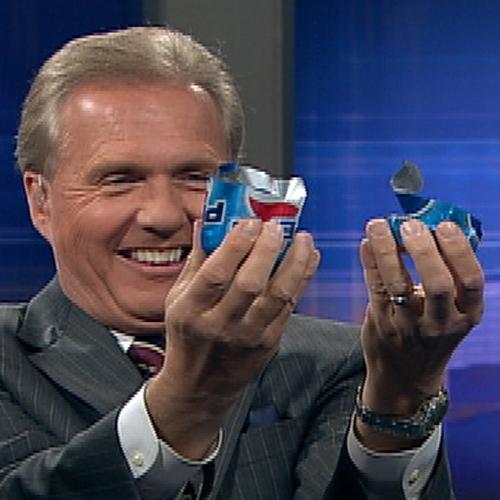
Did you know that soda cans have thin plastic liners inside to keep the acid in the soda from reacting with the metal? No kidding! Take a closer look.
Inside the Soda Can – The Can Ripper
Did you know that soda cans have thin plastic liners inside?

Here's What You'll Need
-
10 g copper (II) chloride crystals (also known as cupric chloride)
-
500 mL distilled water
-
Triangular file
-
Two aluminum pop cans
-
400 mL beaker
Experiment
The Can Ripper Demonstration
The science teacher shows her amazing strength by ripping an “ordinary” soda can in half. As you might imagine, the soda can is far from ordinary. The inside of an aluminum can is scratched with a file to remove the thin plastic coating. A solution of copper (II) chloride (also known as cupric chloride) is added, and the aluminum is oxidized as the copper is reduced. After a few minutes, the teacher can rip the can in half.
Remember, this procedure must be performed by an adult!
- Mix 10 g copper (II) chloride crystals with 500 mL water until it is dissolved.
- Use the file to scratch a line entirely around the inside of the can.
- Pour the copper (II) chloride solution into the can past the scratched line.
- Let the can sit for 15 to 20 minutes in the 400 mL beaker.
- When the scratched line becomes more pronounced, pour the solution into the beaker and rip the can in half.
It’s tricky to know just when to pour out the solution of copper (II) chloride before it eats all the way through the aluminum and the can falls apart on its own. It’s also a good idea to wear gloves when “ripping” the can apart.
Inside the Can – Exposing the Soda Can Liner
Exposing the soda can liner that you saw in the video or in the pictures to the right requires the use of a strong base called sodium hydroxide. This procedure must be performed in a lab with a fume hood.
Remember, this procedure must be performed by an adult!
- Put on your safety glasses, safety gloves, and splash resistant apron. This is serious!!!
- Rinse out a recycled soda can with water.
- Use a coarse sand paper to scratch the paint off the middle part of the soda can. You want the strong base to be able to react with the exposed aluminum metal.
- Fill the soda can with tap water.
- Fashion a hook (using strong paper clips, for example) to attach to the tab on the top of the can.
- Place the can in a 600 mL beaker and pour just enough 6M sodium hydroxide into the beaker to cover three quarters of the can. THIS MUST BE PERFORMED IN A FUME HOOD!
- Over the span of five to ten minutes, the strong base will dissolve the thinnest parts of the aluminum can to reveal the plastic lining.
- Making sure your gloves, glasses, and apron are still on, carefully remove the soda can from the solution of sodium hydroxide and immediately rinse the outside of the can in the sink. Carefully pour the water out of the can (hopefully without tearing the liner).
It’s important to note that many attempts were made to create the soda can that was used on the video. If you get it the first time you try it, you’re amazing!
This experiment inspired a great student research project called Soda Can Corrosion.
If this experiment intrigues you, take a look at Fizz Factor: 50 Amazing Experiments with Soda Pop.
How Does It Work?
As you’ve discovered, aluminum cans have a polymer coating on the inside of the can. When the file is used to scrape away the polymer coating, the aluminum metal is exposed. The aluminum reacts with the copper (II) chloride solution and an electron exchange takes place. Aluminum gives electrons to the copper ions. This causes the copper ions to turn into copper metal.
At the same time aluminum metal turns into aluminum ions. Al metal + Cu+2 ions —> Al +3 ions + Cu metal. The solution ions become a metal (Cu), which are the orange and red particles you see at the bottom of the solution. The new aluminum ions have different properties than the aluminum metal. This is why you can easily rip the can in half. The aluminum ions are not in a solid form, but instead dissolve into the liquid.
Did you know… The main acid in most soda pop is carbonic acid. Some sodas still contain phosphoric acid (which eats away at your teeth!). Both acids are much weaker than hydrochloric acid, which is the natural stomach acid. A can of pop does not make stomach contents much more acidic. In fact, flat soda pop is sometimes recommended as a remedy for nausea. It actually soothes stomach irritations.
Additional Info
The History of the Liner – Technicians at the American Can Company, even before Prohibition, began toying with the idea of putting beer in a can. As early as 1929, Anheuser-Busch and Pabst experimented with the canning process. Schlitzeven proposed a can design that looked like a small barrel.
The major problem the early researchers were confronted with, however, was not strength, but the can’s liner. Several years and most of the early research funds were spent to solve this perplexing problem. Beer has a strong affinity for metal, causing precipitated salts and a foul taste. The brewers called the condition “metal turbidity”.
The American Can Company produced the flat or punch top can in 1934. The lining was made from a Union Carbide product called “Vinylite”, a plastic product which was trademarked “keglined” on September 25, 1934.
Reference – A special thanks to Flinn Scientific for the explanation of the soda can ripper.
