Gardening with Hydrogel Crystals
Water Jelly Crystals are an example of a water-absorbing polymer called a hydrogel. Think of these hydrogels as long chains of molecules (called polymers) that […]

Nothing compares to eating fresh vegetables picked right out of the garden! But, what’s happening out of sight in the soil of that garden? Here are two plant-growing activities you can do anytime of the year to discover the science behind those growing marvels and to discover a unique way to conserve water, too.
ACTIVITY TIMELINE:
Growing plants takes time. Allow at least a week and maybe two to see results of your efforts. Allow about two hours to soak a soil pellet if you use them. Soaking the Water Jelly Crystals is an overnight project for best results. Once planted, you’ll need a few minutes every other day for two weeks to water and observe your garden.

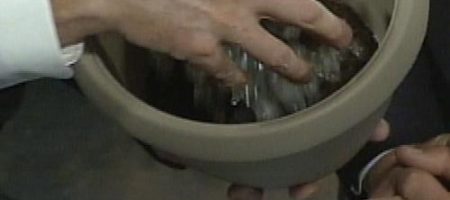
Hydrate the Water Jelly Crystals by soaking a half-teaspoon of them (That’s all you’ll need!) in a bowl of water. These nuggets are a superabsorbent polymer. They start out as a small, hard chunk but the polymer absorbs water and grows. Overnight, a hard chunk becomes a soft, clear, very large, shimmering, jelly-like crystal.
NOTE: Consider using distilled water as the liquid of choice for this activity. Distilled water is usually easy to obtain and not very expensive. Most grocery stores and pharmacies have it for about a $1 (USD) per gallon. Tap water is OK to use but sometimes, purifying it for people changes how plants can use it.
Soak the seeds in water overnight to begin the germination process. This Step softens the seed coat that surrounds and protects the seed. The root emerges through the seed coat first and this Step shortens the wait time for that to happen underground.
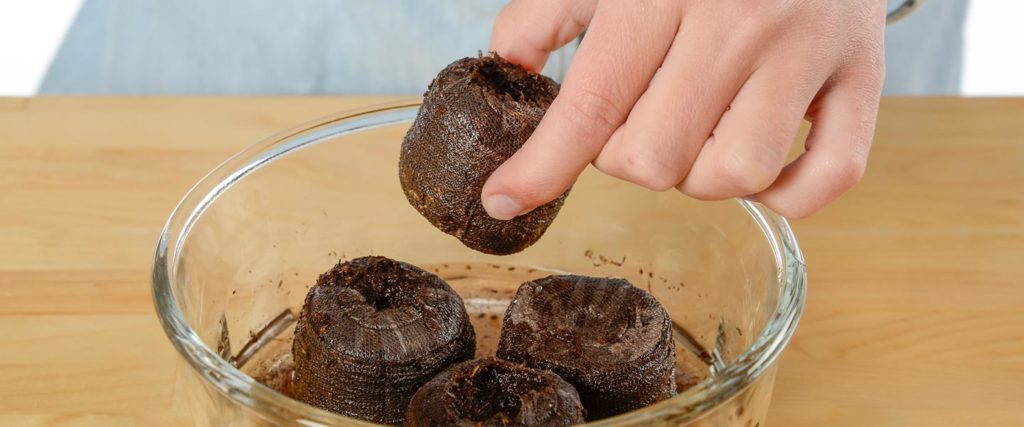
Use the pipette to thoroughly soak the potting soil or soil pellets you’ll be using. There’s no need to flood or over saturate it, however. An easy way to moisten your soil is to use an inexpensive pump sprayer instead of just pouring water on it.
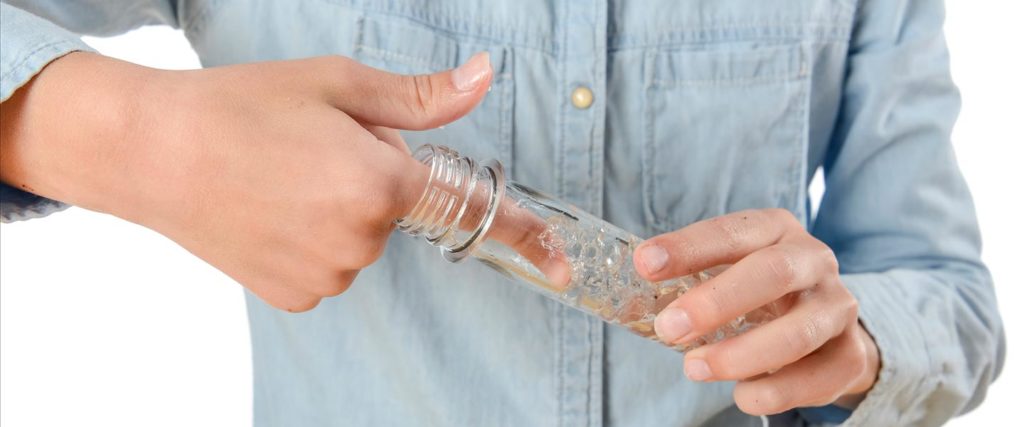
Fill one Baby Soda Bottle (or plastic cup) two-thirds full with hydrated Water Jelly Crystals. You’ll have to press them down a little so there aren’t too many large air pockets between the crystals.
NOTE: This tube will be used to make some comparisons between sprouting and growing seeds in Water Jelly Crystals and soil. Because the crystals are clear, you have a great view of the germinating seed, the growing root system, and the sprouting plant. There is a catch, however. The crystals provide water on demand but something important is missing. Think about what it may be before reading the How Does It Work? section.

Fill the remaining Baby Soda Bottles two-thirds full with potting soil or the dirt you took from a moistened soil pellet. The dirt should have the right amount of fertilizer for the seeds to germinate and the plant to grow. Press the soil into the tube with a finger or the bulb end of the pipette.
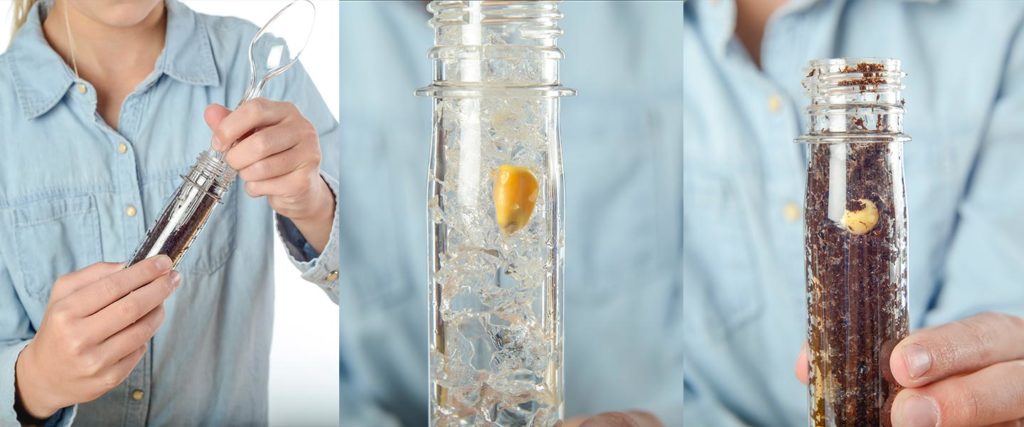
Add a soaked seed or two into each container. Place it near the wall of the container so you can easily see what’s going on inside.
Finish filling the tube with dirt (or Water Jelly Crystals) so the seeds are covered with the same material that’s in the tube.

Place the filled tubes in the rack and find a warm, sunny location. The tubes should be as undisturbed as possible.
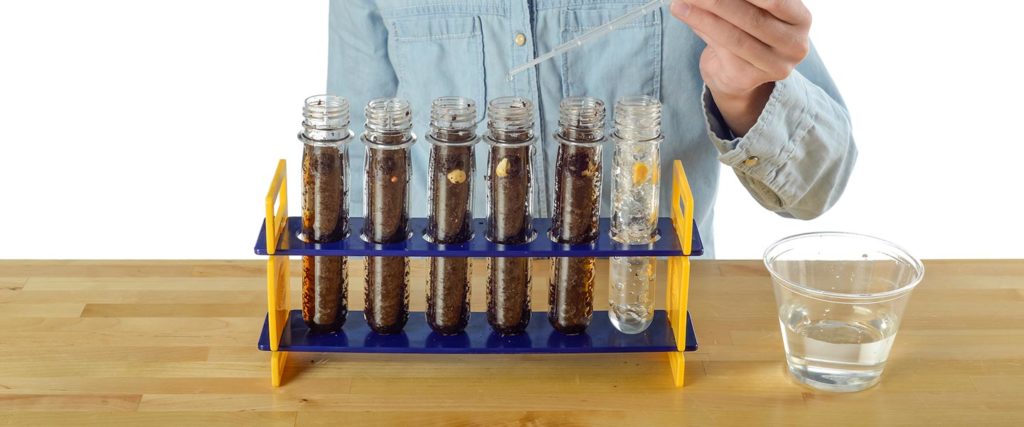
Water every other day or so with a few drops of water from the pipette. Don’t oversaturate the soil, especially since Baby Soda Bottles don’t have drainage holes for excess water. The seeds will rot and won’t sprout in too much water.
It will take from four to seven days before roots emerge from the seeds and grow downward. It’ll be a little longer before the seedlings emerge and begin to grow upward.
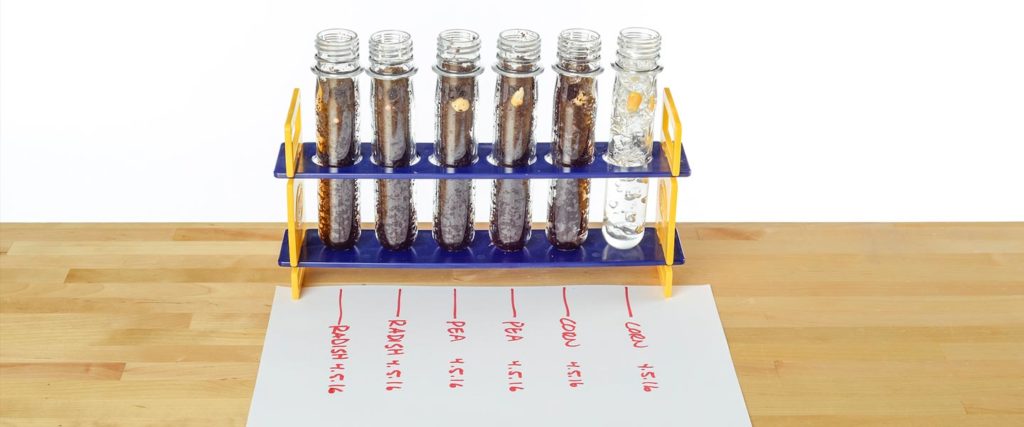
Look at and study the roots and the seedlings. Take pictures or make drawings of the growth you see. Over time, you’ll be able to see exactly how a plant forms and grows out of its seed.
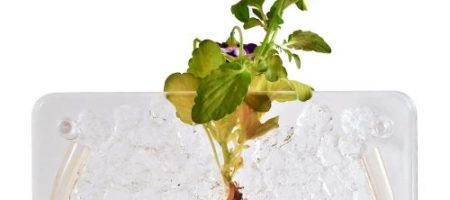
If the season is right, you can transfer the plants to a sunny, outdoor garden after two to three weeks. Prepare the ground first and then gently pry the soil and plant out of the tube with a kitchen knife. Place the entire contents of the tube into the hole you dug. Gently pack the ground around your plant and water it. Take care of the plant and you’ll enjoy its flowers or fruits very soon!
This activity reveals how seeds germinate and roots and plants sprout in either soil or Water Jelly Crystals. After you grow plants the first time this way, test different types of dirt or materials in the tubes. You can experiment with varying amounts and types of water, too. How do seeds survive a drought? What protects a seed against the outside world? What nutrients are needed for best plant growth?
The roots emerge first, grow downward, and establish themselves several days before the plant sprouts and grows upward. Think about why this is an advantage to the future plant. With the clear containers, you can see things happening on the root end well before you would be able to using a traditional pot. You can also observe how the plant stem and leaves grow out of the seed and make their way to the surface. Keep a log and make notes, pictures, and drawings everyday to track your plants’ progress.
Compare the growth of the plants in the dirt to the plants in the Water Jelly Crystals. Which seem to grow faster or better? You know there’s a ton of water available for a plant in the crystals, but what’s missing? Growing plants need nutrients! There’s food for the plant stored in the seed but that gets used up quickly. By the time it’s gone, the plant will have leaves and roots to take over in the kitchen. By themselves, Water Jelly Crystals provide only water and the plant will die unless it gets fertilized.
Farmers and gardeners have been using Water Jelly Crystals to conserve water for a long time. They are available through Steve Spangler Science or at local garden stores. Before using the crystals in a pot or a garden, always hydrate them first. (If you use dry crystals, they’ll shove everything out of the pot or the ground as they get huge with water.) Dig a hole for your plant or seed, add a few hydrated crystals in the bottom of the hole, add the plant, and fill it with dirt. As they dehydrate, the crystals will provide water for the plant. The plant won’t need nearly as much watering, especially during heat waves. Just remember to water the plant so the crystals can rehydrate to have water available agin. That’s right – the crystals are reusable!
Water Jelly Crystals are an example of a water-absorbing polymer called a hydrogel. Think of these hydrogels as long chains of molecules (called polymers) that […]
Steve Spangler is honored to have been chosen as the 2008 National Spokesperson for the 4-H Youth Science Day. Together with his experiment-ologists, the Spangler […]