
Homemade Ice Cream
The Roman emperor, Nero, is credited as the first person to have a type of ice cream made for his meals. Snow was used to […]
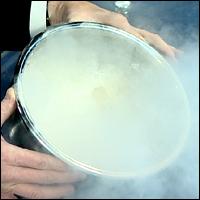
It's been described as the five minute way to make amazing ice cream. No cranking… no ice and rock salt mixtures… and you can forget about those electric ice cream makers. All you need is a little liquid nitrogen (-320°F), some creamy ingredients, and an appetite for exploring the science of food. Keep reading to learn the secrets for finding and safely using liquid nitrogen to make one of the most trendy desserts on the cooking show scene.
Using liquid nitrogen to make ice cream is nothing new. Science teachers have been making “instant ice cream” much to the delight of their students for years (because they love the sounds of ooohs & ahhhs that naturally follow this amazing feat!). But making liquid nitrogen ice cream (or Nice Cream as we call it) has become a craze that's sweeping the trendy cooking shows and the avant-garde chefs who practice molecular gastronomy. In pop culture, molecular gastronomy is the merging of scientific tools and techniques with culinary arts – using tools such as centrifuges, liquid nitrogen, microscopes, or lasers in the preparation of food items. So, it only makes sense that making ice cream amidst clouds of smoke and a big container of liquid nitrogen is the “in” thing to do among ice cream aficionados.
The actual “how to's” of making liquid nitrogen ice cream are quite simple, and you'll find the complete guide, including tips and tricks, later in the article. However, let's start with the most asked questions: What is liquid nitrogen and where do you get it? Back to the chemistry lab we go… You might remember from science class that most of the air we breathe is nitrogen (about 78%) with 20% being oxygen and the remaining 2% a potpourri of gases. Liquid nitrogen is -320°F or -196°C (in other words, it's cold). While liquid nitrogen is used for many temperature-related applications, it's particularly useful for freezing foods because nitrogen is odorless, colorless, and tasteless.
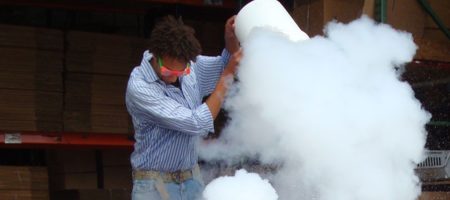
Okay, there is one tiny little negative to using liquid nitrogen to make ice cream… it's dangerous if you're not careful. If you touch the stuff, you can easily freeze tissue and cause severe damage. That's why it's not readily available to the public, and you'll need to get some basic training on how to handle liquid nitrogen before you get started. As Mr. Wizard warns, “Never let liquid nitrogen touch your skin, and be sure to wear your safety gloves and glasses, kids.” You probably won't see your favorite celebrity chefs wearing safety glasses or gloves, but it's a must for kitchen chemists like you and me. Contact with liquid nitrogen can cause injury … it can be dangerous if not used properly.
Here's the best advice… Go to your local high school or university and pay a visit to the science department. Ask around to find out who does the science demos with liquid nitrogen each year for the students and ask if you can come in as a spectator to watch. You'll learn a lot from watching someone who has experience handling the liquid nitrogen (and you're likely to learn a few cool tricks at the same time).
It's not as easy as running to the local grocery store to buy milk. Liquid nitrogen must be stored and transported in a special container called a Dewar, otherwise it will evaporate very quickly. Your best bet is to search your local Yellow Pages for a supplier of liquid nitrogen. You can also call a pediatrician to find out where the doctor purchases liquid nitrogen to burn off warts (now that's appealing when you're talking about ice cream). Welders use liquid nitrogen as well as some farmers (something to do with artificial insemination). Try contacting the chemistry or physics department of your local college or university to find out where they purchase it. Because of liability issues, you probably will not find too many people who are likely to just give you a container of LN2 (short for liquid nitrogen), and you'll need to buy it from a company who distributes it. Many times these companies will let you borrow or rent one of the 5-liter Dewars to transport your secret ice cream making ingredient. You can budget about $1.50 to $2.00 a liter and you'll need about 5 liters to make up a couple quarts of ice cream.
There are hundreds and hundreds of recipes for ice cream, so you'll just need to find one that you like. But one of the benefits of making ice cream using liquid nitrogen is that you can test the batch in just a few minutes. Here's a basic recipe to which you can add anything to make your signature Nice Cream.
Let's start by making a small batch of ice cream until you master the mixing technique. The general rule is to use twice as much cream as milk and sweeten to taste with vanilla and sugar.
The secret to the creamy ice cream is all in the rapid freezing of the mixture. The liquid nitrogen causes the fat and the water particles to stay very small, giving the ice cream its creamy consistency. The goal is to avoid ice crystals – similar to what you get when you make ice milk. According to food science experts, rapid freezing preserves the nutrients in food (a quick-frozen vegetable that's three months old will likely have a nutrient composition closer to harvest levels than a five day old fresh vegetable. The faster you freeze, the less you destroy tissue structures that could lead to a more rapid loss).
One final thought… It's easy to get distracted by the plumes of smoke and the excitement of making instant ice cream, and you forget about common sense and safety. In the teaching profession, we call it a “brain freeze.” Keep your head above the clouds, take all of the safety precautions, and you'll create an unforgettable memory… and some awesome ice cream at the same time.
The Roman emperor, Nero, is credited as the first person to have a type of ice cream made for his meals. Snow was used to […]
Sometimes “clouds” are needed as a special effect to move low across a set or a stage. This creates a dramatic effect for a dream sequence, […]