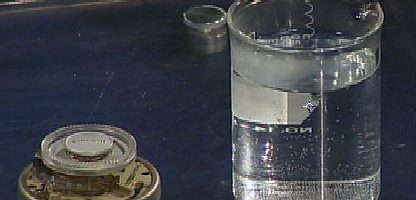
Memory Metal
Can a piece of metal have a “memory?” Yes, if themetal is a special alloy of nickel and titanium. It’s calledMemory Metal, and the uses […]
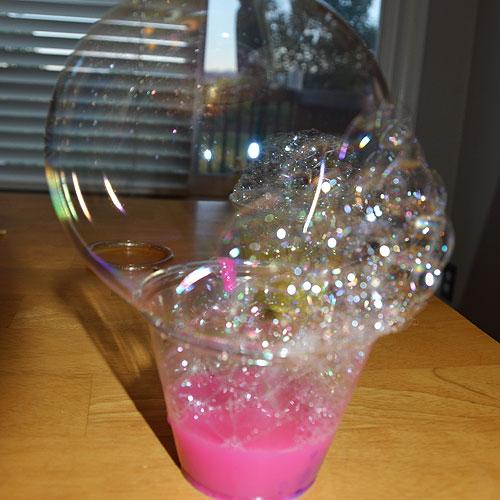
We are often asked about coloring bubbles. No matter how you color bubbles, bubbles will always appear clear. If you mix a little bubble solution with paint or Atomic Glow, the bubbles will still appear clear, but the soap will carry some of the color or glow liquid with it. Transfer the bubbles to paper and make these beautiful prints. This is a perfect rainy day activity or summer afternoon project to do with little ones.
Bubble Colors – Similar to the way we perceive the colors in a rainbow or an oil slick, we see the colors in a bubble through the reflection and the refraction of light waves off the inner and outer surfaces of the bubble wall. You can't color a bubble since its wall is only a few millionths of an inch thick. A bubble reflects color from its surroundings.
The water in the bubble holds the paint and transfers it to the paper. The bubbles remain clear.
Here's more about the science of color in bubbles from the Exploritorium.
We had so much fun with this activity. First, follow the step by step instructions and try to make a good imprint of a bubble stack. If it doesn't show up on your paper, add more paint to the solution.
The best part of this experiment is the experimentation and learning through play. We made a few imprints and then began testing different ways to put the bubbles on the paper. We dropped the pipette on the paper and let the bubbles fall off. We blew bubbles onto the paper and let them pop. The splatter marks were even better.
When you use Extreme Bubble Solution, you can make huge bubbles that sit on the paper for awhile before popping.
I eventually had to send the kids outside to play. I was getting bubble paint all over my table, chairs and floor. Soon enough, my deck was painted with bubble remains.
ACTIVITY TIME:
Allow about 20-30 minutes for this activity. Although, the kids may want to keep blowing bubbles long after the paper dries.
Can a piece of metal have a “memory?” Yes, if themetal is a special alloy of nickel and titanium. It’s calledMemory Metal, and the uses […]