
Homemade Rock Candy
Science is often referred to as the most fun subject in school mainly because… it is! It can be a most delicious subject, too. When […]
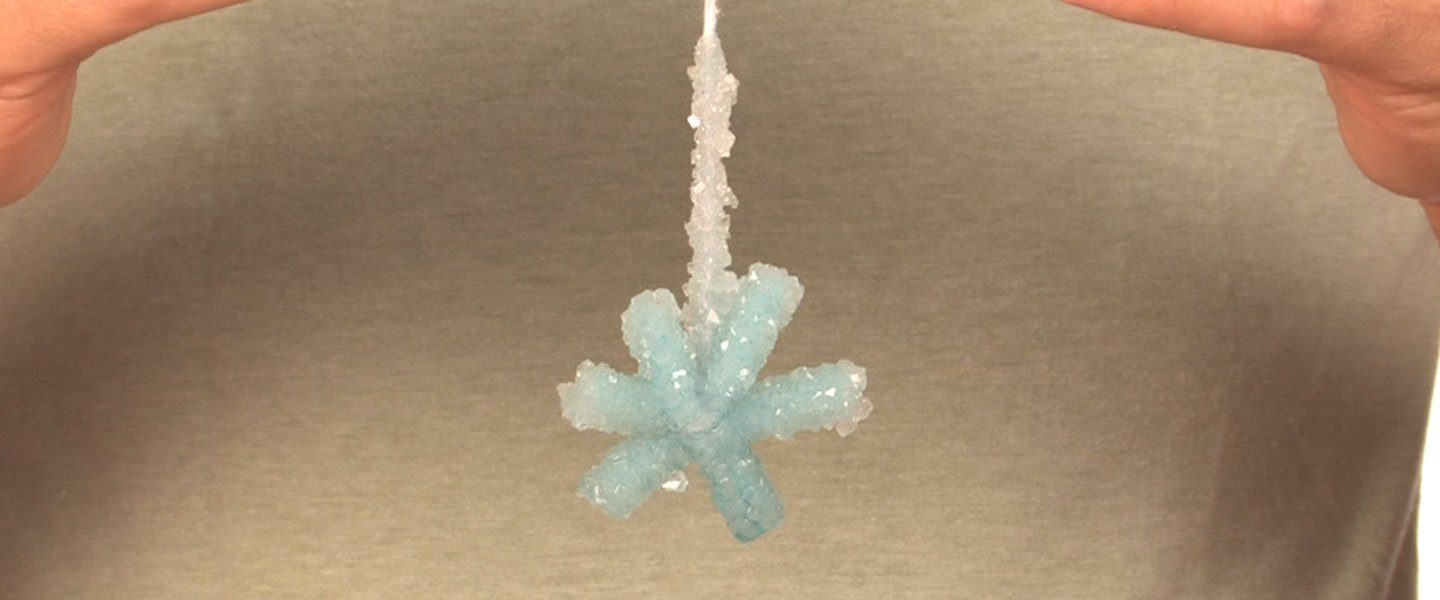
Bringing real snowflakes inside one-at-a-time is next to impossible. The snowy globs on your shoes and gloves don’t count, either. So, to work around this conundrum, here’s a solution using a Borax Crystal Snowflake instead of real snow. This special snowflake is almost just as beautiful and unique as a snowflake you capture from the sky. However, it won’t melt and it’s a heck of a lot easier to see! Besides, the Borax Crystal Snowflake uses some fun, hands-on chemistry and makes a perfect holiday experiment for a perfect holiday decoration.
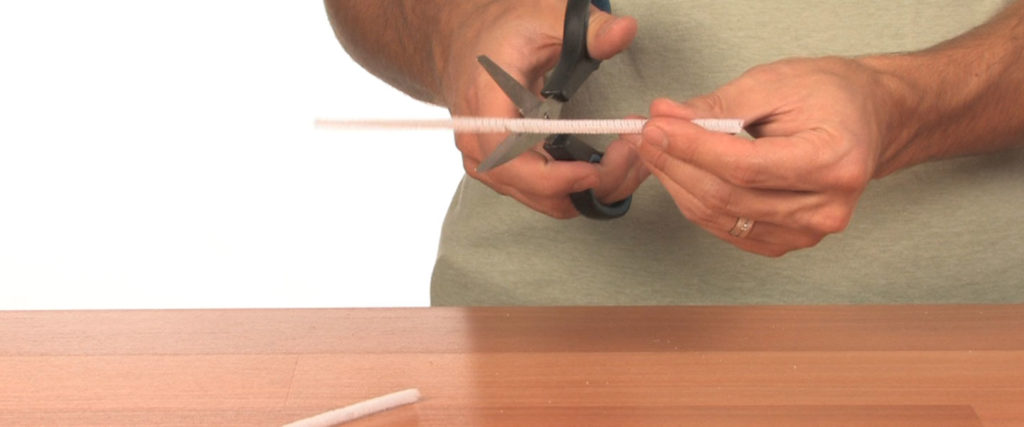
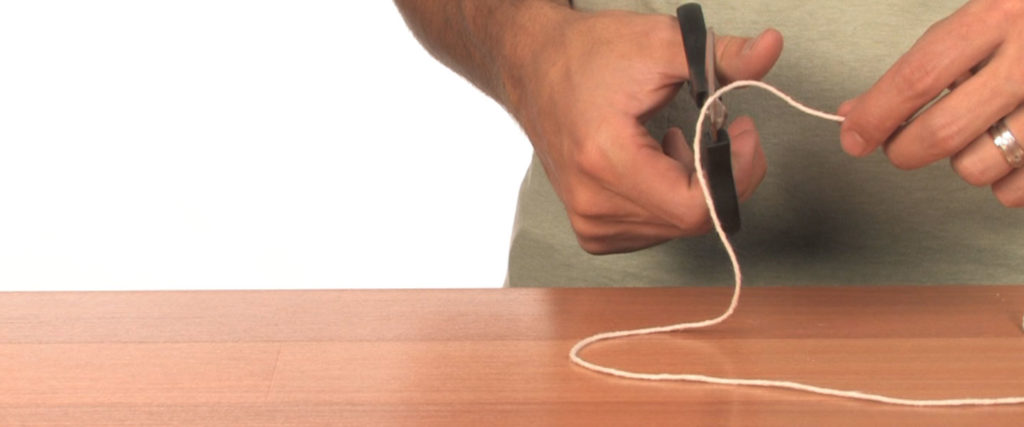
You may have three or more pipe cleaners because you want to make three or more Borax Crystal Snowflakes. That’s great! These directions tell you how to make one so duplicate them if you’re making more. With the scissors, cut a pipe cleaner into three equal sections.
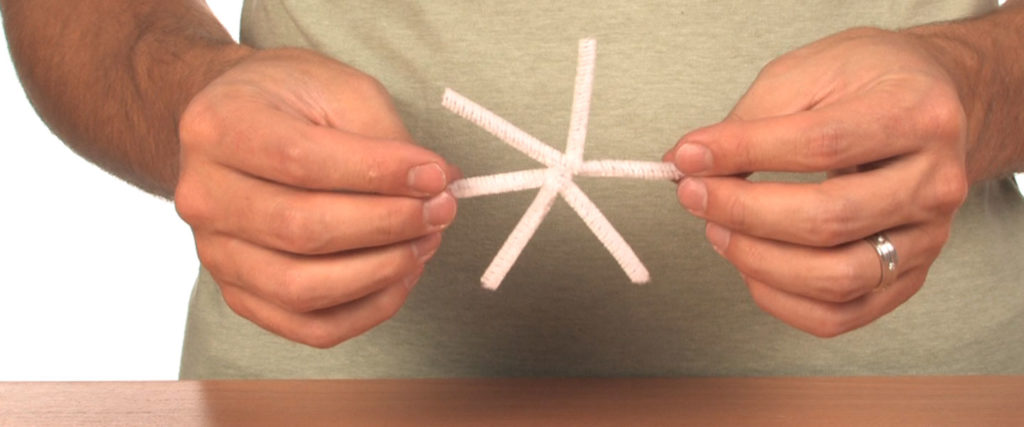
Twist together the three sections of pipe cleaner at their centers to form a six-pointed star. Don’t stress if the sides aren’t perfectly even. Little imperfections make them more beautiful and natural.
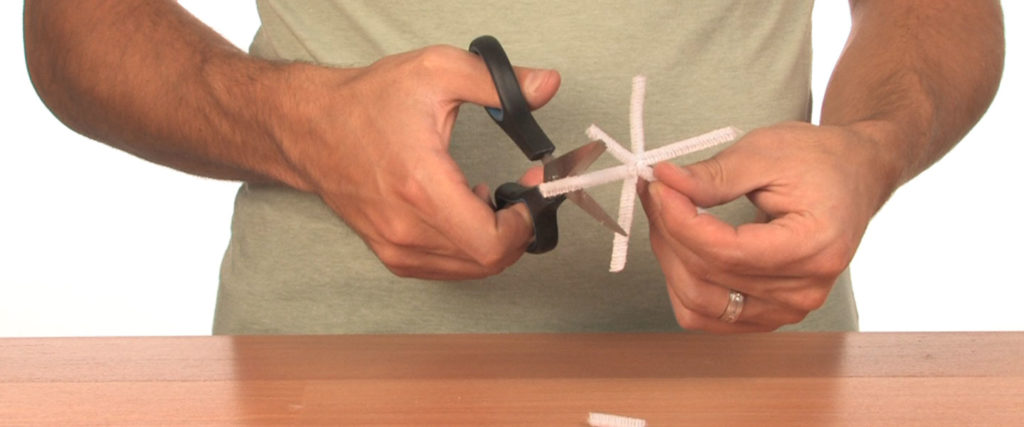
Compare the size of your snowflake to the width of the opening on the container. The shape needs to fit easily into the container without any squeezing. It can’t even be a close fit due to likely crystal growth in the container as well as on the pipe cleaner. If the pipe cleaner can’t easily fit, shorten each section as needed.
Cut a 10” (25 cm) length of string.
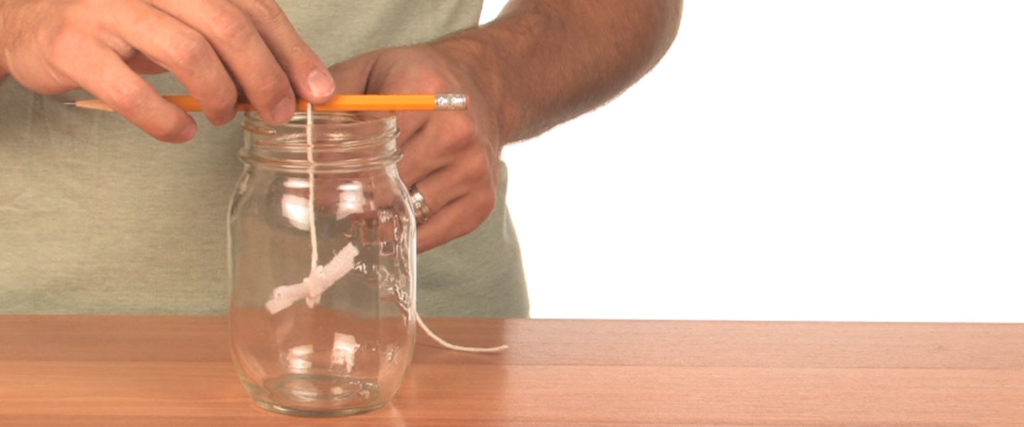
Tie one end of the string to the center of the pipe cleaner snowflake. Lay the pencil across the opening of the container and lower the pipe cleaners into the container. The snowflake can be close to but should not touch the bottom of the container.
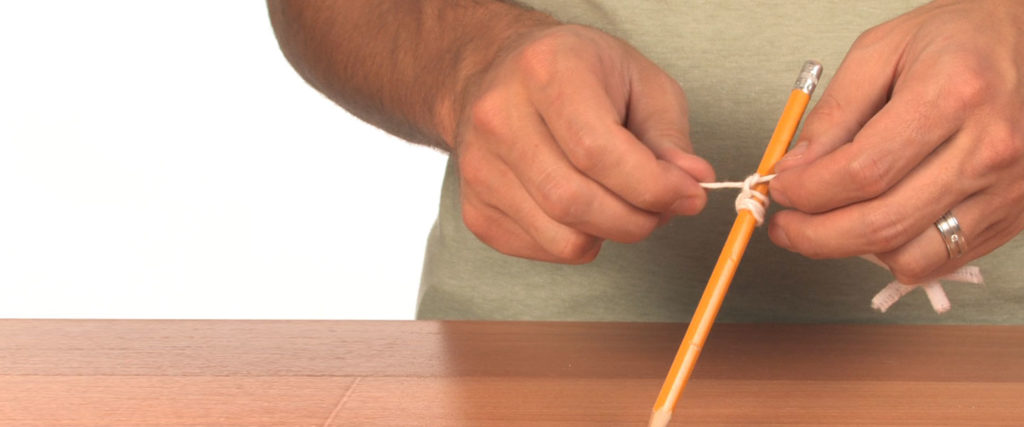
Tie the other end of the string to the pencil so the snowflake hangs freely in the container. When you have your string tied and set, lift the pencil and the snowflake out of the container and set it aside.
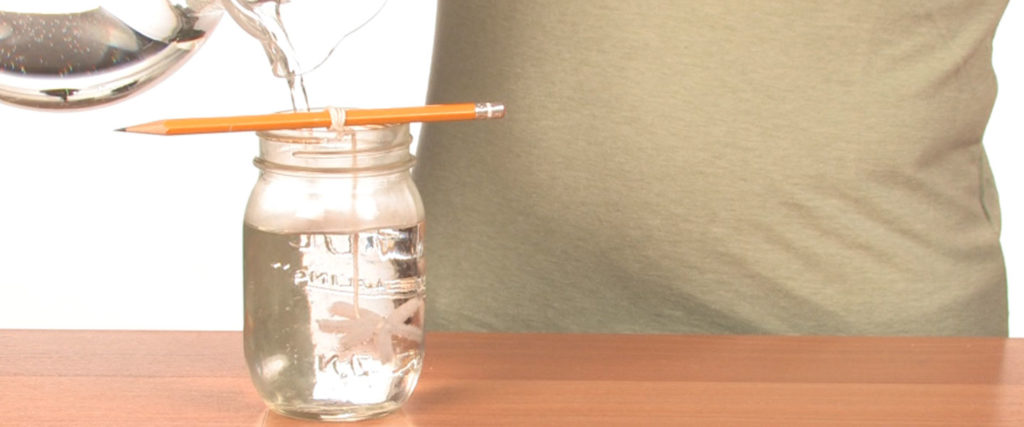
Make sure your crystal-growing container is safe for boiling water! Bring a pot of water to a boil and fill the container with it.
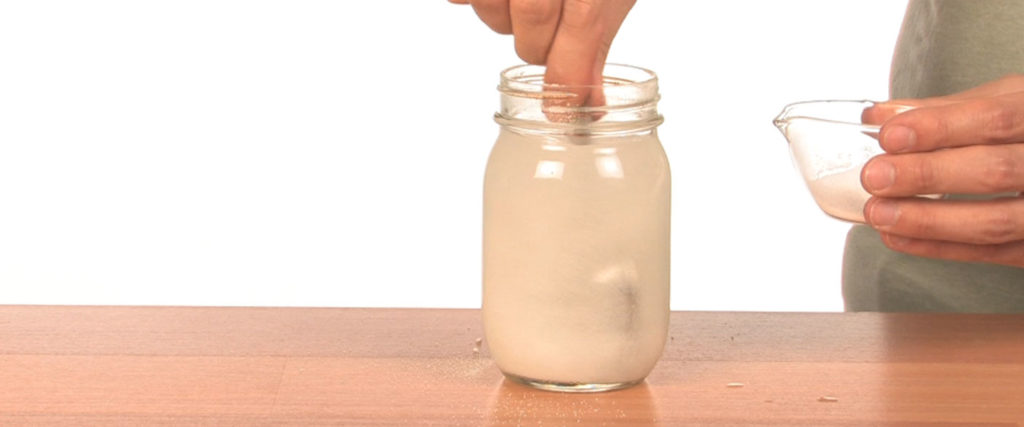
Add 3 tablespoons of borax powder for each cup (237 ml) of water in the container. Stir the solution carefully since it’s hot and get all the borax to dissolve. If there are no borax pieces on the bottom of the container, add another tablespoon and stir. Keep adding and stirring borax until none will dissolve into the water anymore. It’s OK if some borax settles to the bottom of the container.
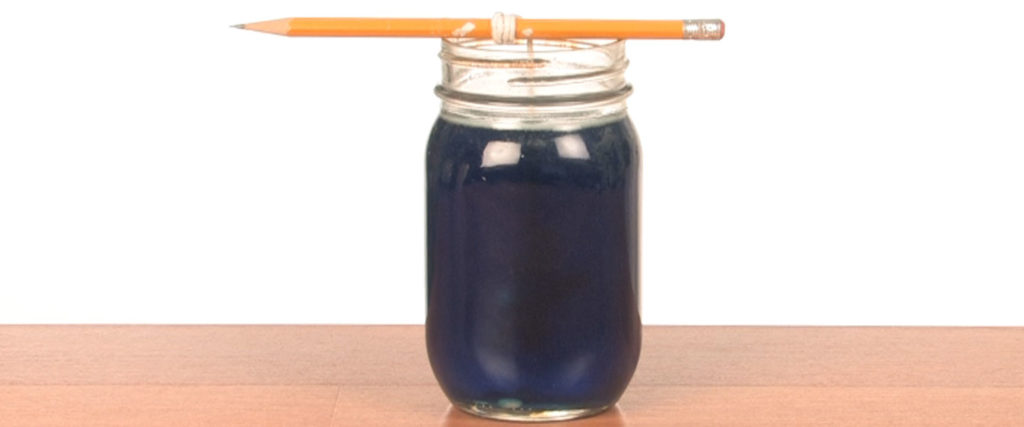
If you want a colored snowflake, stir in some food coloring. More coloring – 20+ drops – is probably better than fewer. Lower the snowflake into the hot, colored supersaturated solution and let it sit, undisturbed overnight. Moving or bumping the container while the crystals are growing is not a good idea so put it in a warm, out-of-the-way place. The next day, carefully lift the pencil and check out the gorgeous crystals! Untie (or cut) the string from the pencil and you’ve got yourself a beautiful, sparkly, colorful holiday decoration!
When you mixed the borax and water, you created a suspension of borax. A suspension is a mixture that contains solid particles large enough to make the liquid appear cloudy or murky. By mixing the borax into hot water, instead of room temperature or cold water, the borax can stay suspended much longer. Very hot water can hold much more dissolved borax than cold water. Hot water molecules are moving very fast and are spread way out which makes space available for more borax to dissolve into it. As the mixture cools, the water molecules slow down and move closer together. That means there’s less room for the dissolved borax and it begins to fall out of the water.
As the borax settles out out of the cooling suspension due to gravity, it bonds with other borax on nucleation sites (bumps, tiny cracks, impurities, etc. in the container) and begins to form seeds for further crystallization. Crystals come together in specific, repeated patterns due to the shape of the molecules forming them. You’ll see this crystallization on the bottom and sides of the container, on the string hanging from the pencil, and on the pipe cleaner arms of the snowflake. The borax continues to fall and crystalize on top of the snowflake and on top of other borax crystals until you pull it out of the water the next morning.
Want a bigger snowflake? Leave it in the solution longer or make another saturated solution and soak your snowflake in it. The crystals will take up growing where they left off. Just be sure you can get your finished decoration out through the opening of the container.
Borax dust can be harmful if swallowed, inhaled, or gets into your eyes. For some people, touching it can result in a rash. Because it can be harmful if inhaled or contacts your eyes, boil the water separately, pour it into your container, and then add the borax. That minimizes dust in the air around you.
Science is often referred to as the most fun subject in school mainly because… it is! It can be a most delicious subject, too. When […]
Water Jelly Crystals are an example of amazing hydrogels… superabsorbent polymers that are saving the environment. Superabsorbent polymers are rapidly becoming one of the most […]
A vacuum packer is an amazing device that vacuum packs food to seal in the freshness. At least that’s what those late night infomercials tell […]