Candy Science - Floating Letters
M&Ms have the slogan of melting in your mouth, but not in your hands. You wanna know something cool? The special melting property is totally […]
Science is often referred to as the most fun subject in school mainly because… it is! It can be a most delicious subject, too. When you make this treat, you’ll be jumping “string-first” into some serious chemistry that’s hiding as candy. You’ll discover and use principles like solutes, solvents, viscosity, sedimentation, solutions, and supersaturated solutions. How tasty does all that sound?
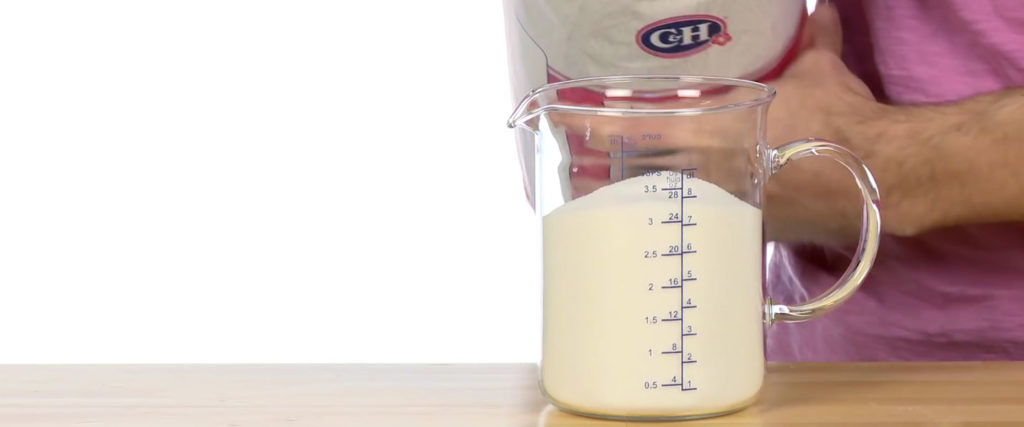
Pour about 3 cups of granulated cane sugar into the large glass container.
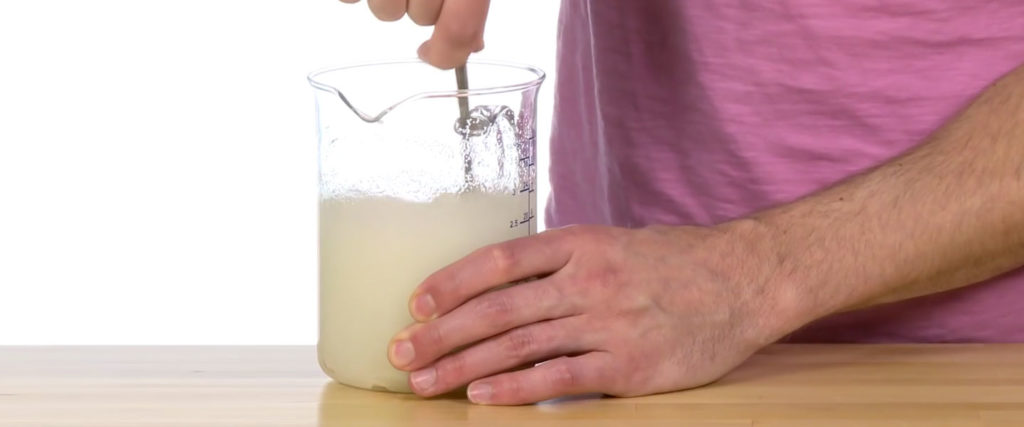
Add 1 cup (237 ml) of water to the sugar. Watch what happens as the water bubbles through all that sugar. There’s a lot going on in the container already. Use the heavy spoon to thoroughly stir the water (a solvent) and the sugar (a solute) together to make a solution. It will be very viscous (thick) and heavy because there’s a lot more sugar than water in there. Stir it well!
An adult must help with this Step! You need to give the water some help with all that sugar so warm up the water. If the container is microwave-safe, put the solution in the oven and heat it for two minutes on high. (You can use a cooktop to heat the solution if you prefer.) Heat the solution to the boiling point.
CAUTION: An adult must handle the hot solution and move it to a stable, heat-safe location. Use the heavy spoon to thoroughly stir the solution again. Make sure all the sugar is stirred but watch out for splatters of hot liquid. Notice how the solution is changing by just using heat.
An adult must help with this Step! Move the stirred solution to the microwave (or cooktop) again and heat it on high for another two minutes. Don’t let the solution boil over.
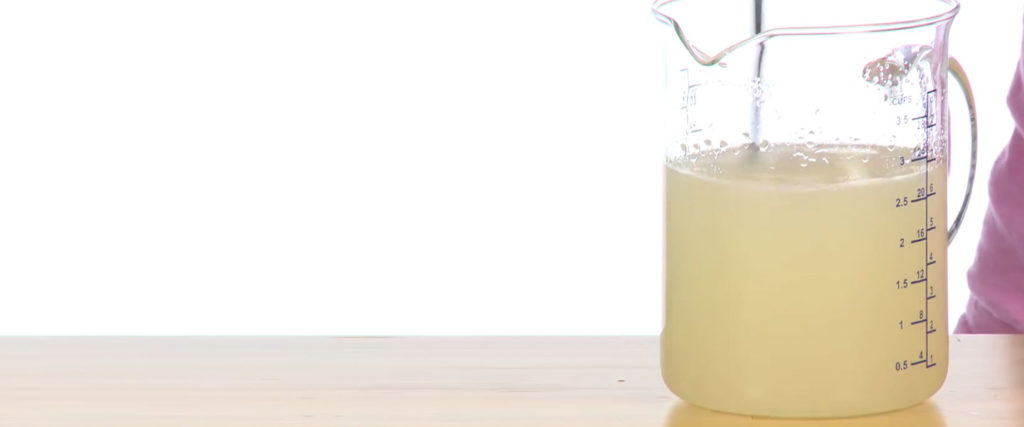
CAUTION: An adult must handle the hot solution and move it to a stable, heat-safe location. Use the spoon to carefully stir the hot solution again. Stir gently because the solution is less viscous (more runny) than before you heated it.
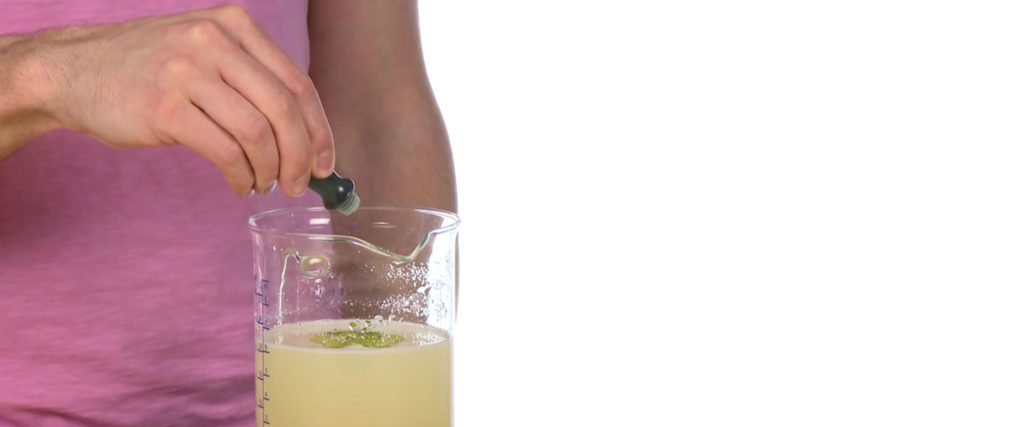
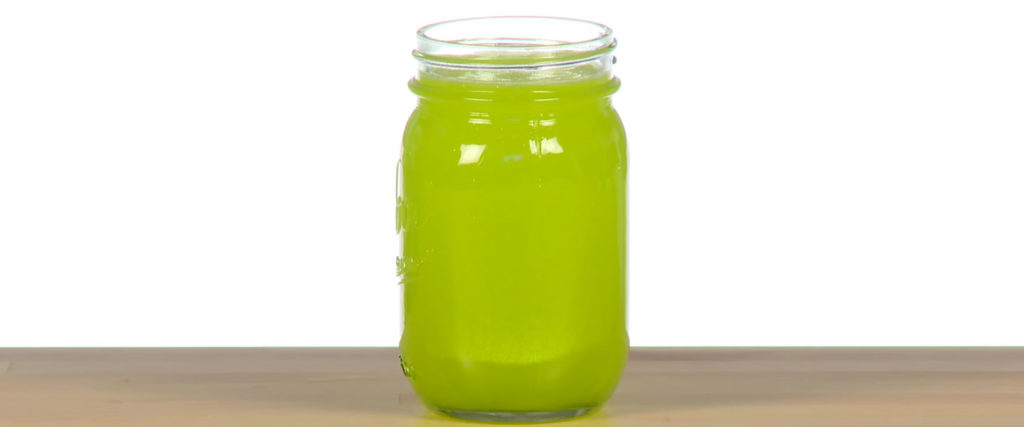
Add 3-7 drops of any food coloring to the mixture and stir it in thoroughly.
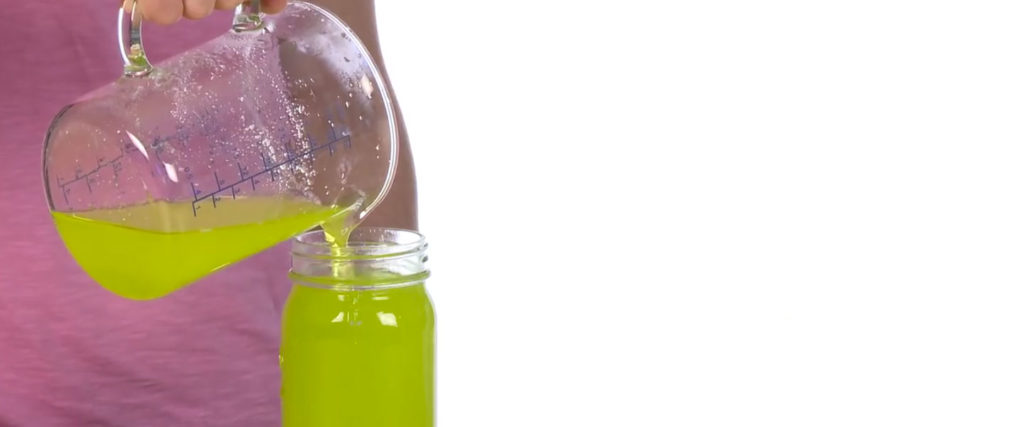
Pour the colored solution into the smaller glass container.
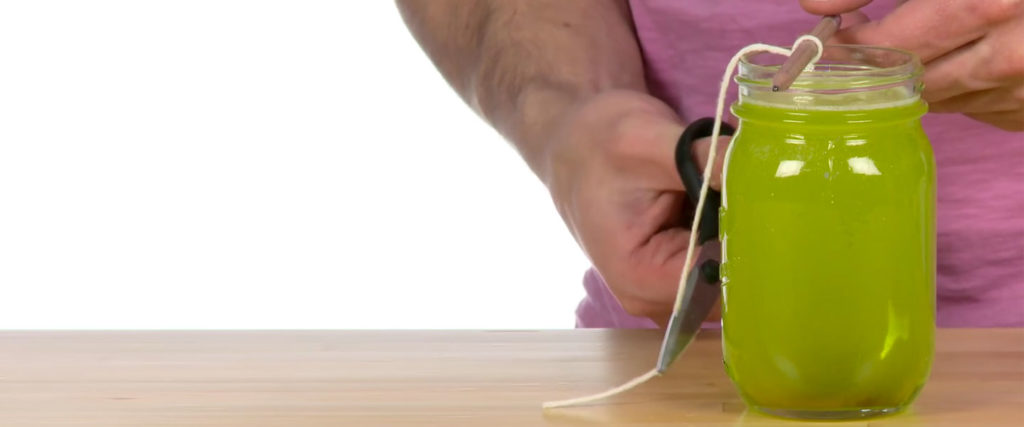
You need to use clean string and that’s why new is preferred. On an old roll, unroll some until you get a layer or two under the top layer. Tie the string to the middle of the pencil. Use the scissors to cut off a length longer than the small container is tall. Lay the pencil on top of the small container and trim the string so it’s about 2/3 the height of the container. You want it shorter than the container.
Holding the pencil, lower the string into the solution and let it soak for a short time. You want the solution to soak through the string. Lay the pencil and soaked string on a piece of wax paper so the string is perpendicular to the pencil. Allow the solution to cool to room temperature and the straight string to dry completely.
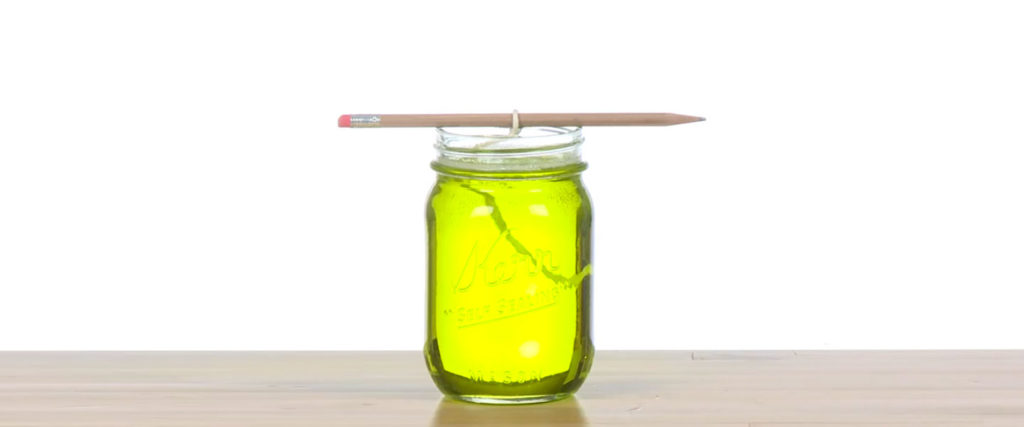
As it cools, the solution becomes more viscous so it might be a trick to push the dried string into it again. You may have to use a slow steady pressure to get it to sink deeply into the solution. You’ll need to allow the string to soak in the solution for a week, too. A paper towel over the container will keep dust and goobers away from your candy – uh, your science experiment. Keep track of changes in the solution and the growing crystals in the solution but don’t disturb them by moving them. Pictures are a good idea!
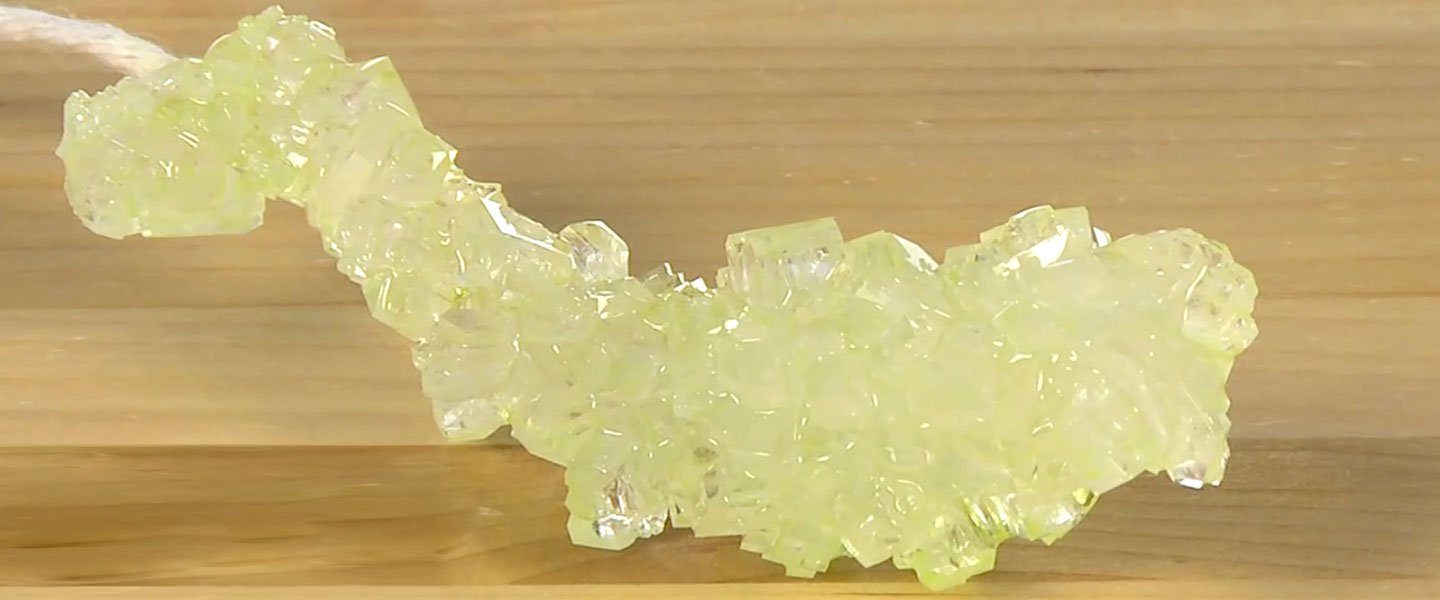
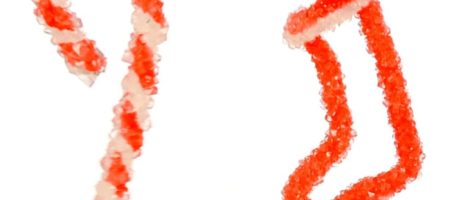
When you’re ready for the big reveal, lift the pencil and pull the string loaded with crystals out of the jar. Lay them on some wax paper and look closely at what grew on the string. Of course, a taste test will have to be a part of your analysis.
So, you dip a string into a solution of sugar and water and it seems pretty uneventful. It’s kind of like watching paint dry. How in the world did it turn into a beautiful crystal of candy on a string?
When you mixed the sugar with the water and then heated and stirred the solution repeatedly, you created a supersaturated solution. This means there are far more dissolved particles of solute (the sugar) than the solvent (the water) can normally dissolve and hold at a given temperature. By stirring the sugar in hot water instead of room temperature or cold water, the sugar is dissolved faster in the fast moving (heated) water molecules. As the water cools, the huge amount of sugar particles remains in solution (a supersaturated solution) and it contains more sugar than can stay in the liquid. The sugar falls out of the solution as a precipitate (particles). These connect with other sugar particles, and a crystal begins to grow.
You gave the suspended sugar paticles a great place to begin crystallizing when you dried some crystals onto the string ahead of time. These are “seed” crystals. As sugar particles begin to settle (the precipitate), they join and form crystals quickly with other sugar molecules. You see this crystallization on both the bottom and sides of the jar as well as on the string. Sugar molecules continue to settle and crystalize on the string and on top of other sugar molecules until you pull it out of the solution and enjoy the candy.
M&Ms have the slogan of melting in your mouth, but not in your hands. You wanna know something cool? The special melting property is totally […]

Hard candies are known for their bright colors, delicious tastes, as well as having a ton of sugar. While munching on a handful of candy […]
Sugar is delicious, sweet and… perfect for creating colorful, beautiful ornaments? This holiday season, grab a bag of granulated sugar and mix yourself a supersaturated […]

Sugar has many uses but maybe you didn’t know it can be used to make “glass” – even stained glass. You combine the science of […]