Making an Electric Circuit
You enter a dark room and reach for a switch to turn on the lights. In fact, most off the time, you don’t even think about it; you just […]
You probably know that voltaic batteries come in all kinds of shapes and sizes, from tiny button batteries to car batteries to huge industrial heavy-weights. They turn chemical energy into the electrical energy that people use to power clocks, toys, cell phones, medical devices, tablets, cars, satellites… and an LED! These batteries seem pretty complicated but you can make a real voltaic battery right in your kitchen. Grab the ice tray and start the electrons moving.

Tightly wrap a piece of copper wire five times around a galvanized nail just under the head of the nail. Leave a tail of wire extending straight out from the nail about 3” (8 cm).
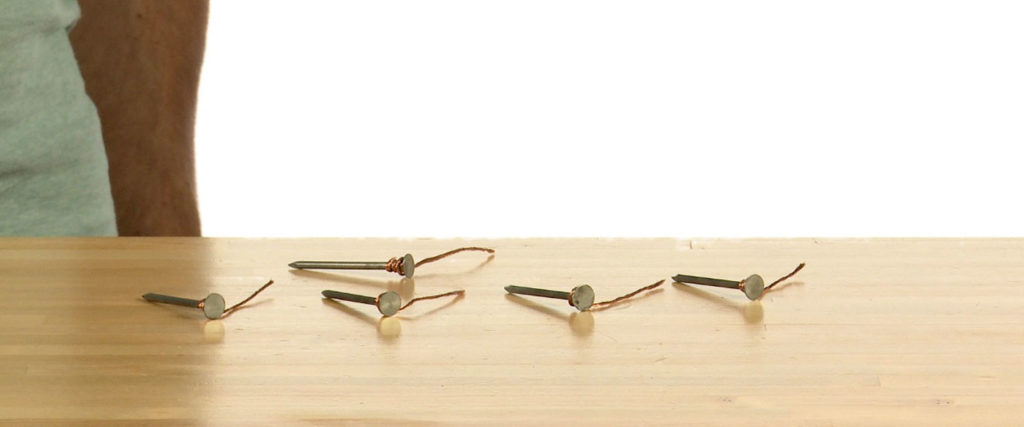
Repeat Step 1 with the remaining four nails and four pieces of copper wire.
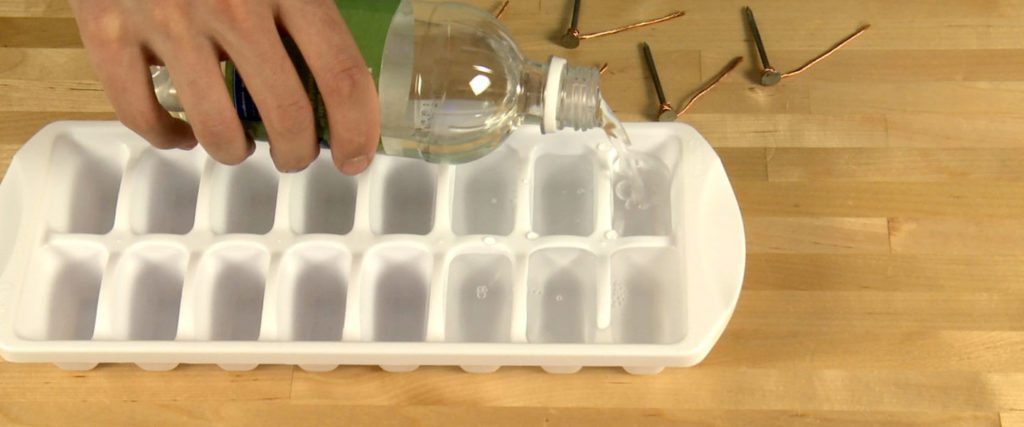
Fill six wells of an ice tray with distilled white vinegar.
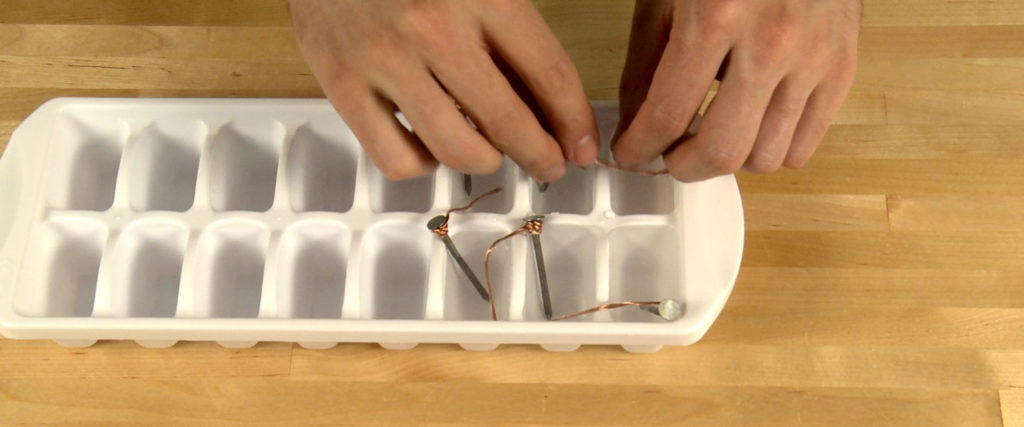
You’ll create a circuit by placing each nail into one well of vinegar and making sure the copper wire is bent so that it goes into the vinegar in the next well. The wire is an electron bridge from one well into the next. Make sure the wire from one nail does NOT touch the nail or wire in any other well. There should be only vinegar between the metals in each well.
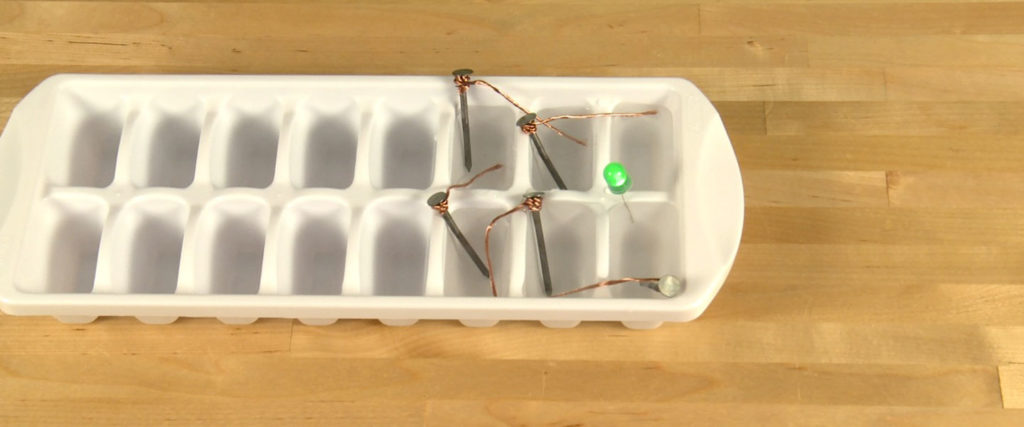
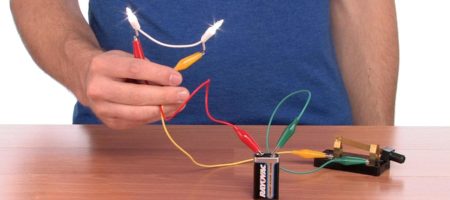
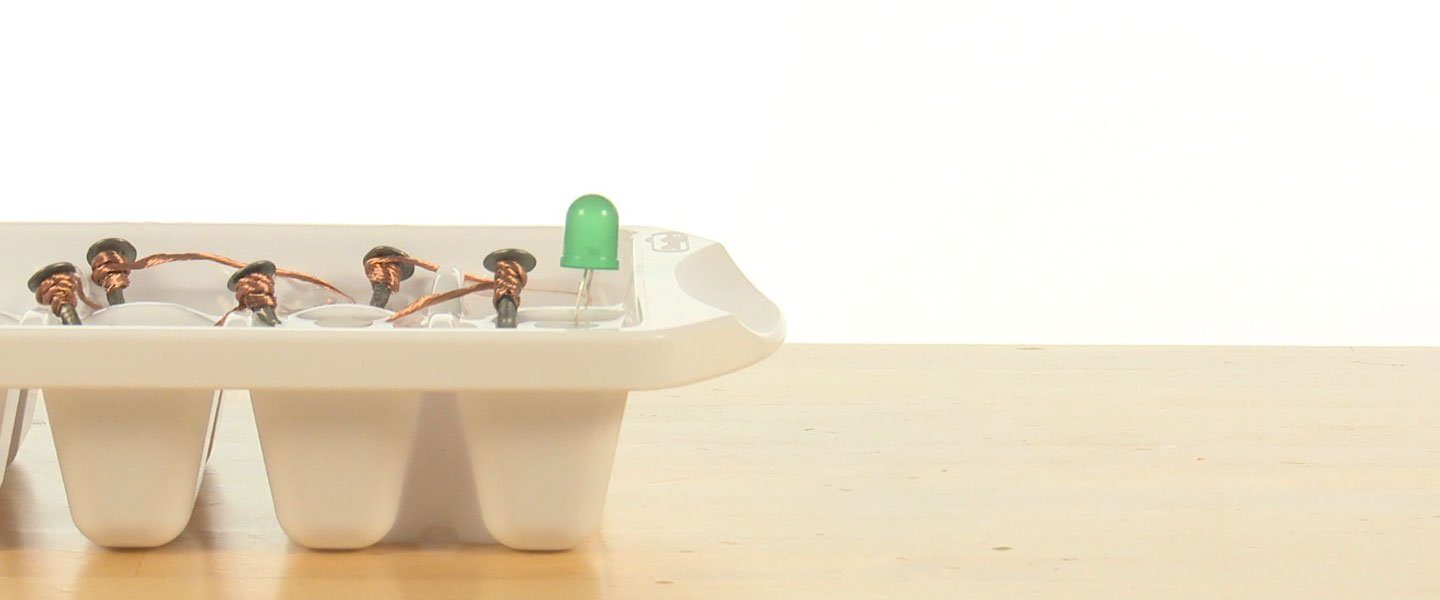
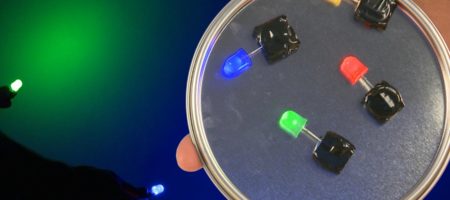
Place one “leg” of the LED into the well with only a copper wire inside it and place the other “leg” into the well with only a nail in it. If the bulb lights up, you nailed it! If the bulb doesn’t light up, just lift the bulb out of the well, rotate it a half-turn to move the legs to the opposite well, and lower it back into the vinegar. It lights up!
These kind of batteries are comprised of two specific metals that are “suspended” in an acidic solution. With the Ice-Tray Battery, the two metals are zinc and copper. The zinc is in the galvanization on the nail (galvanization prevents rust) and in the copper of the wire. The acid comes from the vinegar you poured into the ice tray. More specifically, since vinegar is almost all water, the acid comes from the 4-8% of acetic acid dissolved in it. The two metal components are electrodes. They’re the sites in a battery where moving electrons (the current) enter and then leave the battery. With this vinegar, zinc, and copper set-up, the current will flow from the wire bridge (copper), across the vinegar, to the nail (zinc), and then along the bridge to the vinegar and… well, you get the idea. The electricity passes easily through the acidic solution of vinegar in the wells. Some liquids help this flow and some can stop it altogether.
Once the Ice-Tray Battery is connected to the LED, you create a “complete” or closed circuit. As the electrons pass through the LED, the electrical energy excites atoms inside it and they emit a specific wavelength of color as they fall back to a lower energy level. You see it as a lighted LED. The electrons pass continuously one way through all of the components unless the circuit is “broken” or opened. Because an LED needs a specific direction of electrons passing through it to glow and you happen to put the “legs” into the battery backwards, it won’t light up. Just reversing the wells the legs are in makes it all good, the flow is right, and you’re rewarded with a glowing LED.
You enter a dark room and reach for a switch to turn on the lights. In fact, most off the time, you don’t even think about it; you just […]
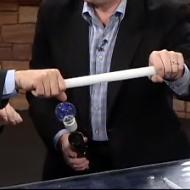
The Energy Stick makes quite the “buzz” when you’re using it. To the untrained eye, it appears to be a plastic tube with a jumble […]
Voltaic batteries of all shapes and sizes are devices that convert chemical energy into electrical energy. You probably use batteries to power your cell phone, iPod, […]
When you are conducting experiments and demonstrations using electricity, you’ll use the science of circuits. Amazing things are possible with circuits including alarms, radios, and […]
Ordinary people use standard electricity from the wall to powera light. Oh, but not you! Why use normal electricity from the walloutlet when you can […]
Graffiti Research Lab first introduced us to the awesome throwie idea, and we loved it. Ever since, we’ve been playing around with the idea of […]

You can do some pretty amazing things with non-Newtonian fluids, and the same can be said of static electricity. When you combine the two, you […]